I’m not going to lie to you. Pizza is not the easiest thing to cook on the grill. But you don’t have to be an expert to pull it off, either.
The watchwords for great pizza on the grill are patience and diligence. Pizza is not the kind of grill item that allows you put it on the grate and walk away. You need to stand over it, checking it every minute or so. And when the crust is done, you have to be willing to let it rest on the cooler part of the grill while the cheese melts. For best results, you’ll do small, personal-sized pizzas, one at a time.
First things first: The dough. Remember that pizza dough is a basic type of bread dough. Though you are not allowing it to rise to the height of bread during the cooking process, the dough still has the basic ingredients of good bread dough, and you should allow it to rise at least once. You certainly can use the dough without letting it rise, but you will be happier with the results if you do. You will have a lighter crust with a nicer texture if it has risen at least once.
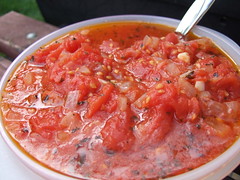
The next thing to consider is the toppings. If you want a quick pizza the kids will like, spread a good, jarred spaghetti sauce on and top it with a store-bought shredded pizza cheese mixture and pepperoni. Grownups may prefer a nice, light, homemade tomato sauce, fresh buffalo mozzarella slices and grilled Italian turkey sausage. Whichever way you go, set up your toppings for easy access before you start cooking. This technique, called mis en place, or “everything in its place,” will come in handy during the grilling process.
When you have your dough ready and your toppings set up nearby, it’s time to start to your grill. I will admit to you now that I thought I was going to have to tell you that gas grills reign supreme when it comes to cooking pizza. My first attempt at pizza, on my charcoal grill, was not that great. But when I tried this process again, with gas and charcoal grills going side-by-side, I found good results from both. I’d like to blame my grill, especially since I’m lobbying for a new one, but I have to admit that I think the cook might have been the culprit.
If you have a gas grill, turn one burner to “high” and the other burner to “medium” or “low.” If you are working with charcoal, start a good, hot fire on one side. Once your fire is going, scrape a few pieces of charcoal toward the center. Whichever type of grill you use, you want a hot fire on one side and a cooler spot on the other. Assemble your barbeque tools. For best results, have ready a long pair of tongs and the largest metal spatula you can find.
Once you’ve shaped your pizza crust according to the recipe, spread oil on the top. This is the side that will go down first. With an oiled paper towel, rub the grates over the hot side of the grill. Pick up your pizza crust and place it oil-side down on the grate. I found it best to lay the dough on my pizza peel (you could use the back of a cookie sheet if you have no peel), oil it, slide it to the edge of the peel and then onto my hand. With about one third of the dough on my hand, I drag the rest of it off the peel and let the dangling end down onto the grill grate, oil-side down. Then I ease the rest of the dough onto the grate.
Keep your eyes on the pizza dough. After a minute or so, depending upon the temperature of your fire, you’ll be able to lift the edge of the dough with your tongs. As soon as the dough gets to the color you want, remove it from the grill with the spatula. I usually find that one half is just right and I need to turn the dough 180 degrees to get the other half brown. The top will still be pretty raw.
After you remove the dough from the grill, take it to your topping table. Brush oil liberally over the uncooked part and place it oil-side down on a dinner plate or other flat surface. Now you are ready to dress the cooked side.
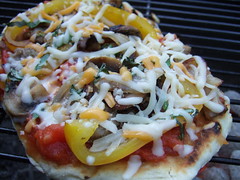
When you dress your pizza, remember you are going to be manipulating it a bit on the grill. If you laden it down with a lot of heavy toppings, you’ll run the risk of dropping bits and pieces into the fire. Try to keep your cheese a bit away from the edge, too. As it melts it will run and could drip into the fire and cause flare-ups.
Take your dressed pizza, on the plate, back to the grill. Slide it carefully off the plate onto the hot side of the grill. Follow the same technique as you did the first time, checking every minute or so for browning on the bottom, turning as needed. When the crust is the way you want it, slide the pizza over to the cool side of the grill.
At this point, depending upon the heat of your fire, your cheese may or may not be melted. If it still needs a bit more time, leave the pizza on the cool side and shut the lid on the grill. Go prepare your next pizza crust, periodically checking the status of the cheese on the cooking pizza. Remove the one from the grill when the cheese is ready and start the entire process over with the next pizza.
For The Lancaster News
Tomorrow I'll post the pizza dough and tomato sauce recipes